Eldredge Knot
Eldredge Knot
Meaning and History
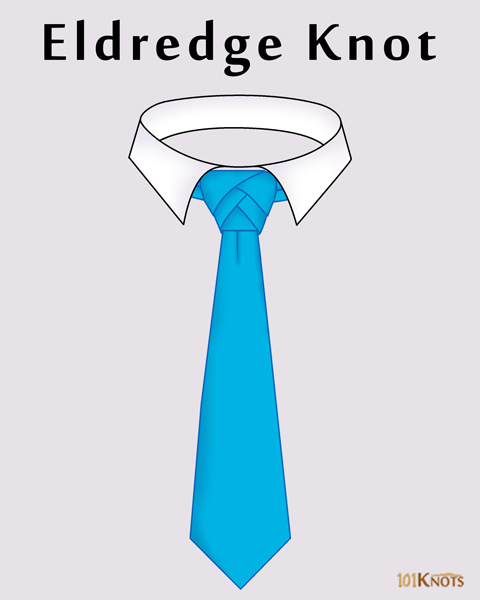
This exotic necktie knot comprises of four diagonal bands and one horizontal band overlapping each other. It is made with the smaller end as the active end, much like the Trinity knot. The complex, attractive knot was invented in 2007 by Jeffrey Eldredge, a system administrator who got bored of wearing the four-in-hand knot to office every day and wanted to try something different. It achieved huge internet fame in 2008 and is larger than the Windsor knot.
How to Tie an Eldredge Knot
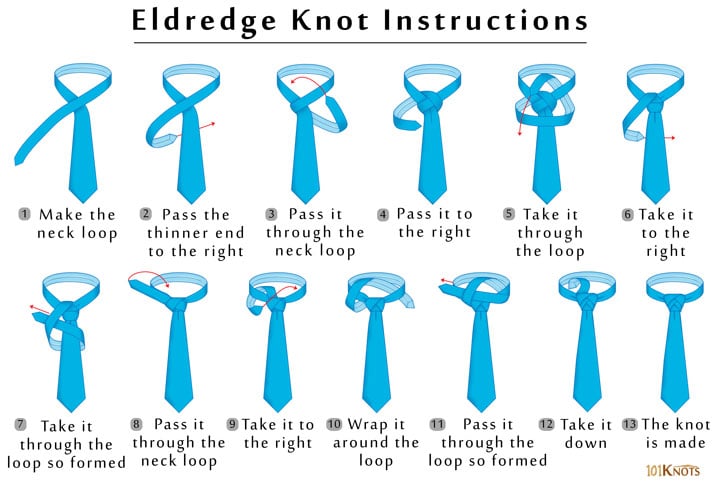
The beginner-friendly step by step diagram gives you a mirrored view of the tying procedure. You need to practice the steps a good many times to tie it easily. Start by taking a tie of standard length.
How to Tie an Eldredge Knot
Style Tips
- Though the tapered fishtail braid effect looks asymmetric, the knot itself has a symmetric, triangular shape. This makes it appropriate for wearing on formal occasions like business meetings. However, we don’t recommend wearing it to job interviews as it might be distracting.
- Solid and patterned ties work best for this knot as they highlight its natural folds and shadows. Avoid tying it in striped and paisley ties as they make it look shabby.
- The fancy knot could get you noticed at parties, weddings and even in a professional environment (if you are allowed to wear unorthodox knots).
- Though it suits thicker ties more, you can do it in skinny ties as well.
- It should be worn with wide-spread collars.
Variations
- Double Eldredge knot – It requires two neckties but sports a similar look.
- Caped Eldredge knot – It is a combination of the Merovingian and Eldredge knots.
The Eldredge Knot Step By Step Instructional Video
How to Do the Eldredge Knot: Point of View (POV) Video Tutorial
How to Tie an Eldredge Knot Step by Step
- Make the neck loop
- Pass the thinner end to the right
- Pass it through the neck loop
- Pass it to the right
- Take it through the loop
- Take it to the right
- Take it through the loop so formed
- Pass it through the neck loop
- Take it to the right
- Wrap it around the loop
- Pass it through the loop so formed
- Take it down
- The knot is made


Most Read
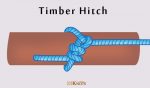 Timber Hitch
Timber Hitch The timber hitch is used to secure a rope round a post or any cylindrical...